What you’ll do on this page
- Install Zed — free download for macOS, Windows, or Linux.
- Sign in and start the Pro free trial — two weeks, $20 of model credit.
- Set the agent’s model to Claude Sonnet 5 — the one setting worth getting right.
- Optional: add your own OpenRouter key and switch to GLM 5.3 Flash so you can keep going cheaply when the trial credit runs out.
Why this route exists. The rest of the AlpacApps instructions assume Claude Code or Codex on a paid plan. Zed is the way to do the same work without a subscription: the editor is free forever, and the agent runs on trial credit first and your own API key after. It is slower and more hands-on, but nothing here is locked behind a monthly bill.
Step 1 — Install Zed
Free download, no account needed just to install. The download page detects your platform and offers the right build.
Both buttons go to zed.dev/download, which carries the macOS build (requires macOS 10.15 or later), the Windows build, and Linux. On Linux you can instead run curl -f https://zed.dev/install.sh | sh.
Step 2 — Sign in, then start the Pro free trial
Open Zed and sign in with your project account. Then go to your Account page while logged in and upgrade to Pro to start the free trial.
The trial
Two weeks, and $20 of token credits included, plus unlimited accepted edit predictions. It ends when the two weeks pass or the credits run out — whichever comes first.
After the trial
Pro is $10/month with $5 of tokens included, billed at list price +10% beyond that. Or drop back to the free Personal plan and run the agent on your own key — see Step 4.
One thing to know about the trial. The very top-end models — Claude Fable, Claude Opus, and GPT Pro — are not available during it. That is fine: the model this page tells you to use is, and it is more than strong enough for the setup work.
Plans and credit amounts change. Current terms are always at zed.dev/pricing.
Step 3 — Open your project folder and set the model
- Open a new, empty folder — File → Open Folder. Do not point it at an existing repository; the agent creates and clones the project for you.
- Open the Agent Panel — the assistant icon in the bottom-right status bar, or the Command Palette (Cmd Shift P) and run
agent: new thread. - Click the model name at the bottom right of the Agent Panel. A Select a model… list opens.
- Choose Claude Sonnet 5 under the Zed heading — the one tagged Latest.
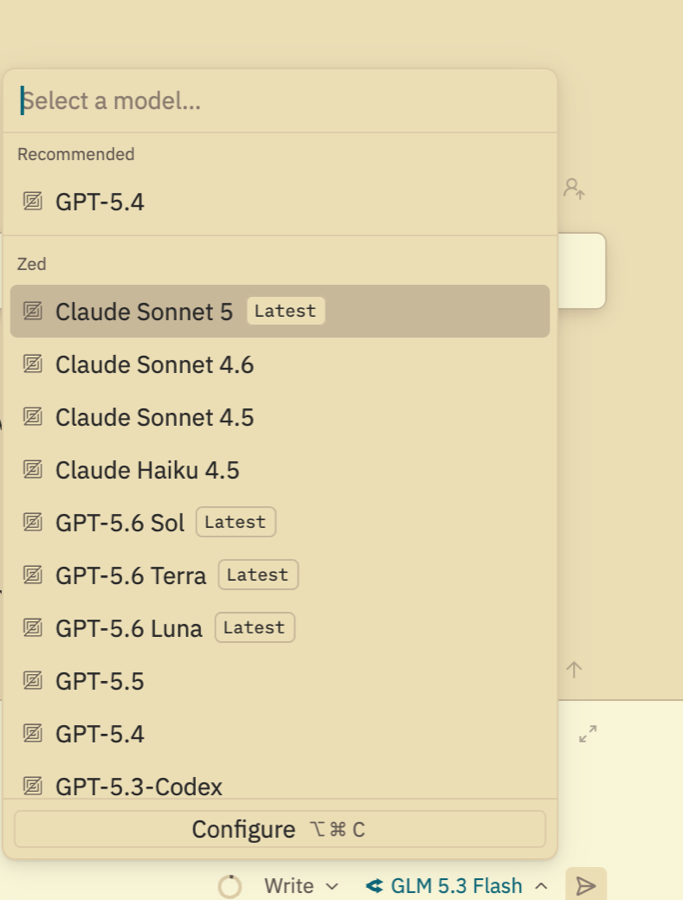
Claude Sonnet 5 is the setting that matters. It is the strongest coding model included in the trial credit, and it is what the AlpacApps instructions were written against. You can switch models per thread later — but start here, and change only when you have a reason.
Where Zed’s settings live
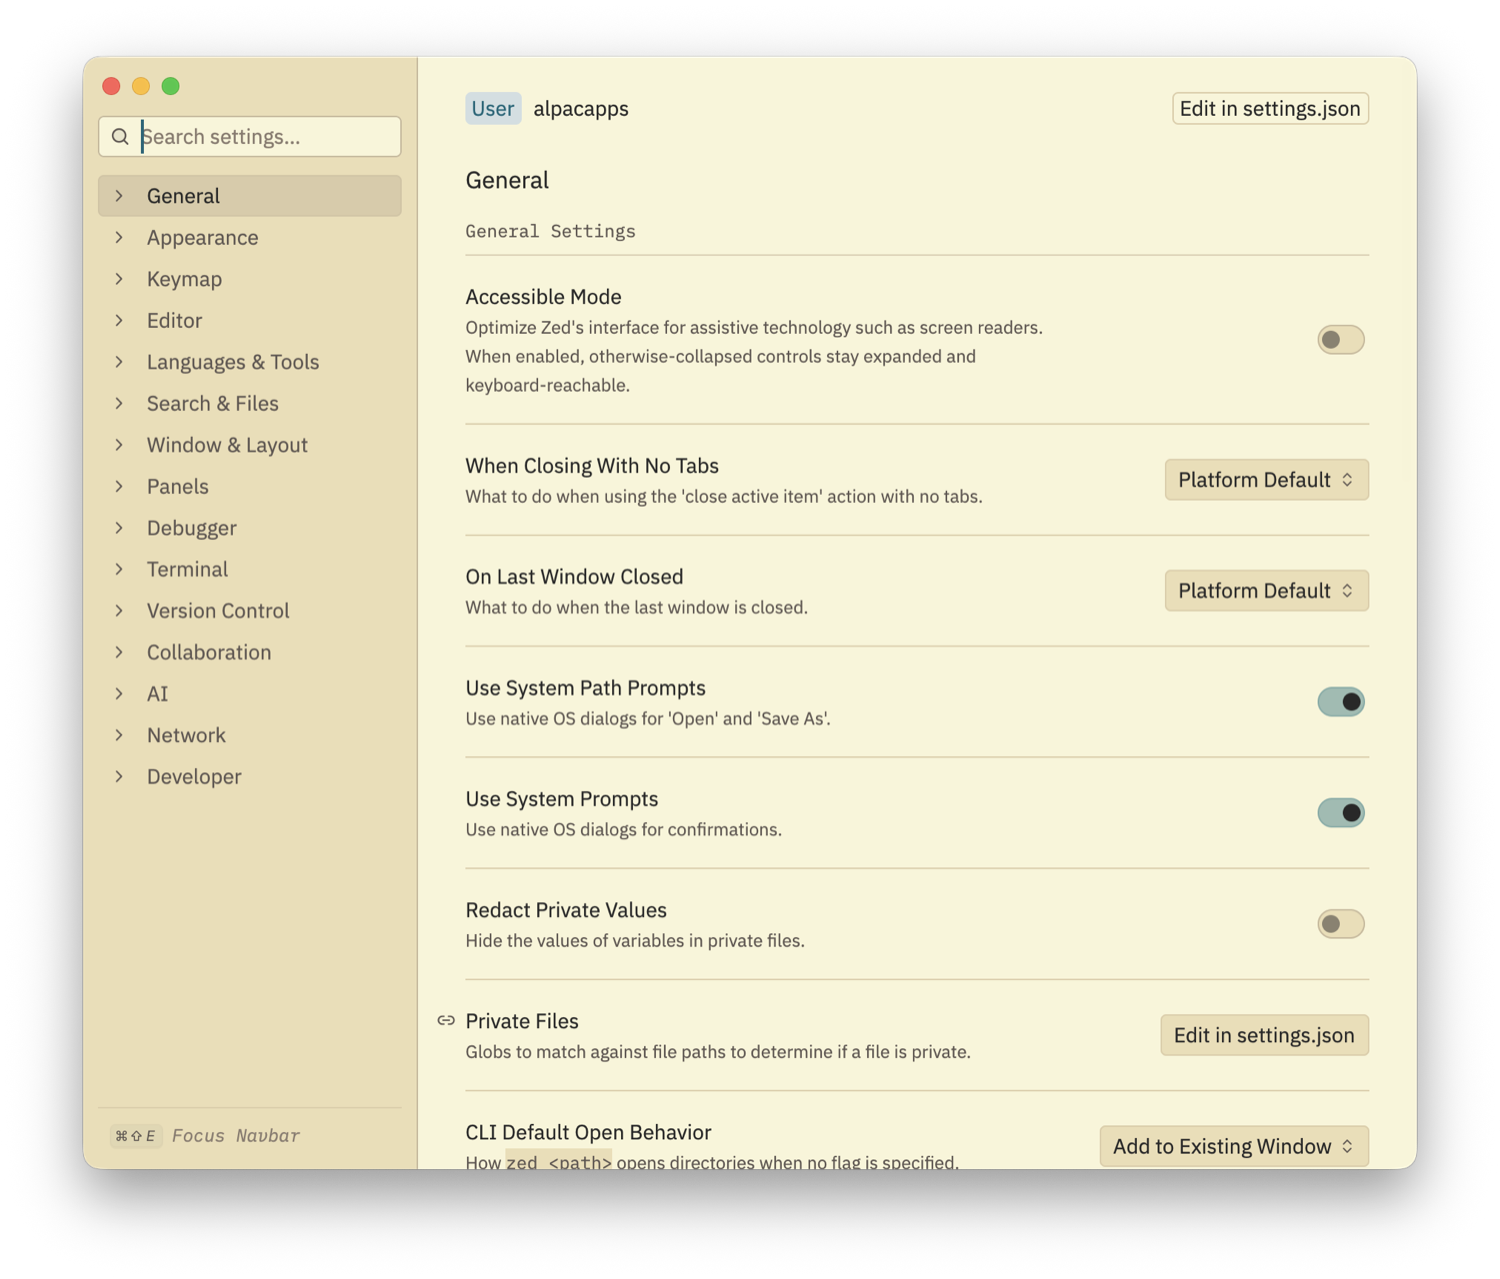
You need this window for Step 4, and for anything else you ever change in Zed. Two ways in:
- The macOS menu bar: Zed → Settings → Open Settings
- Or just press Cmd ,
Either one lands you here — the sidebar down the left is how you move between sections:
Step 4 (optional) — Bring your own OpenRouter key
Skip this until you need it. Come back when the trial credit runs out, or when you want a very cheap model for the repetitive work. OpenRouter is one account that reaches hundreds of models, billed per token with no subscription — often cents a day on a cheap model. The one to start with is GLM 5.3 Flash; details in step d below.
a. Create the key
Go to openrouter.ai/keys, create a key, and add a few dollars of credit to the account. Store the key in your credential manager the moment you have it.
Never paste an API key into a chat — including a chat with your coding agent. If a key has ever been in one, treat it as burned: revoke it at openrouter.ai/keys and create a replacement before you save it anywhere.
b. Open Settings → AI
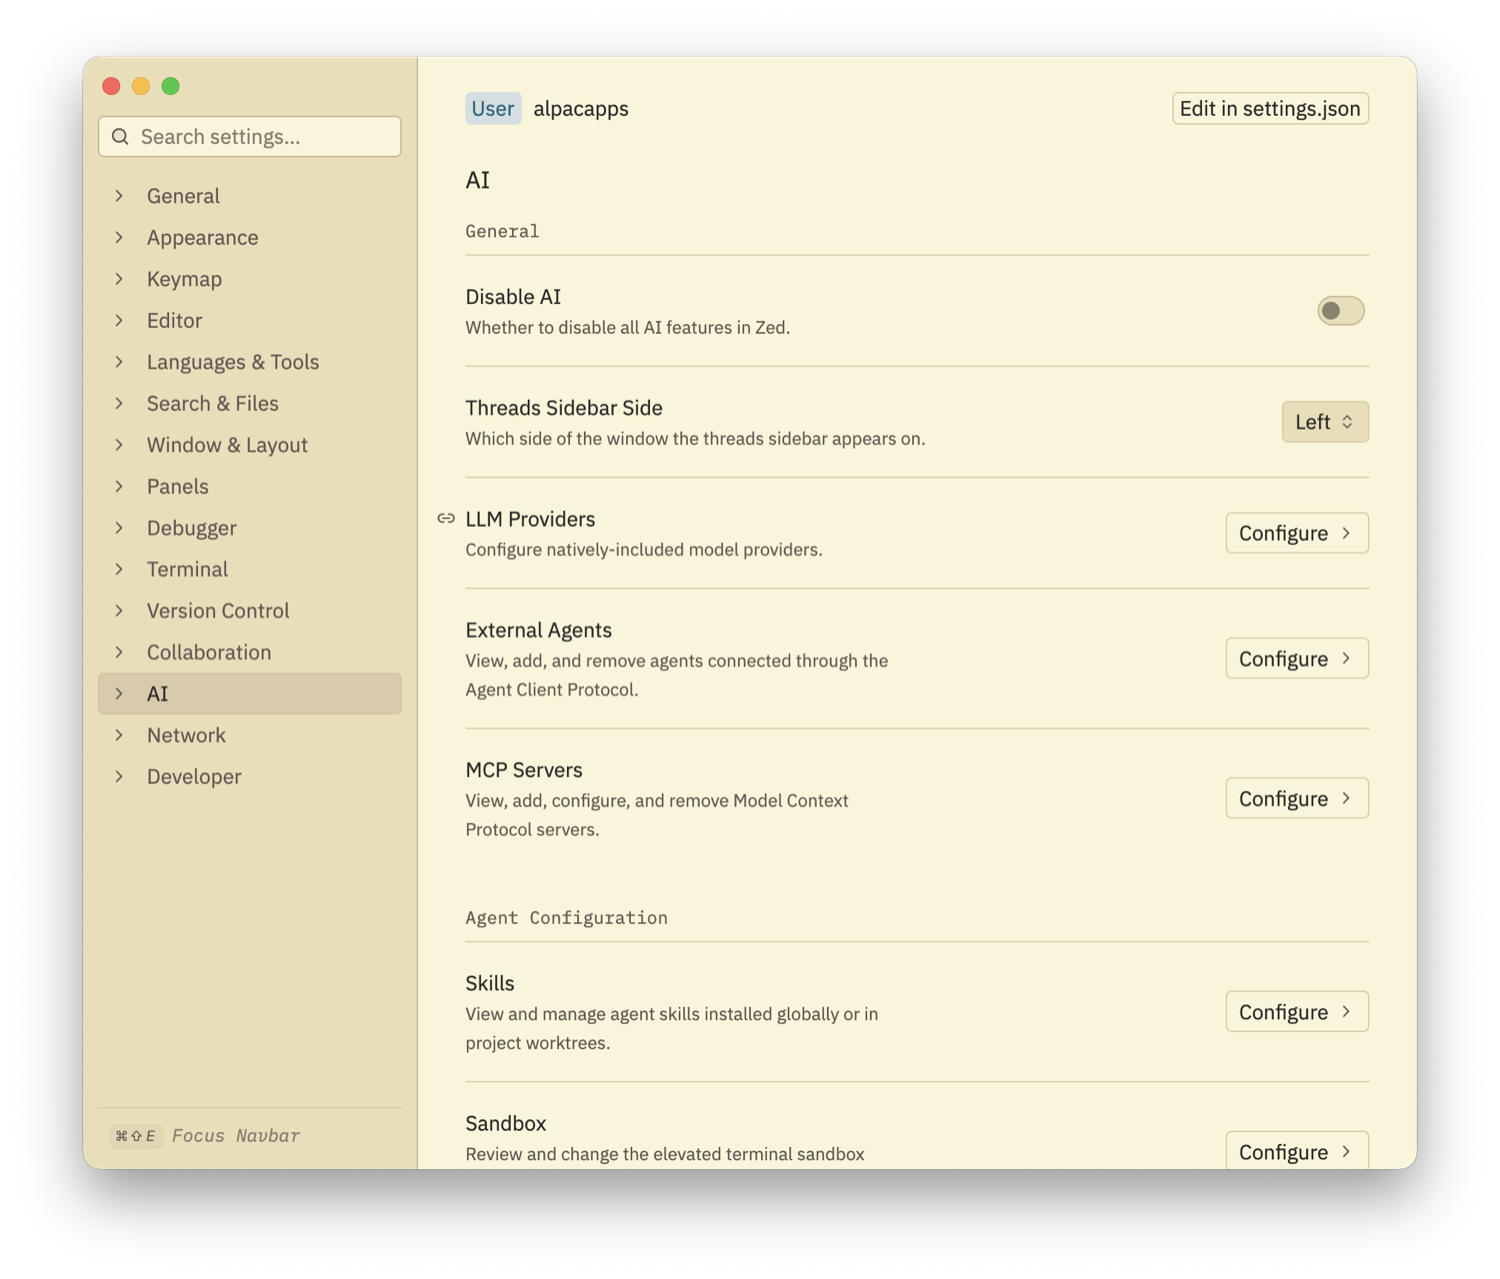
Press Cmd ,, then click AI in the left sidebar. Find LLM Providers and click Configure.
c. Scroll to OpenRouter and paste the key
You land on User / AI / General / LLM Providers — a long list of providers, each with its own API key box. Scroll down to OpenRouter and paste your key in.
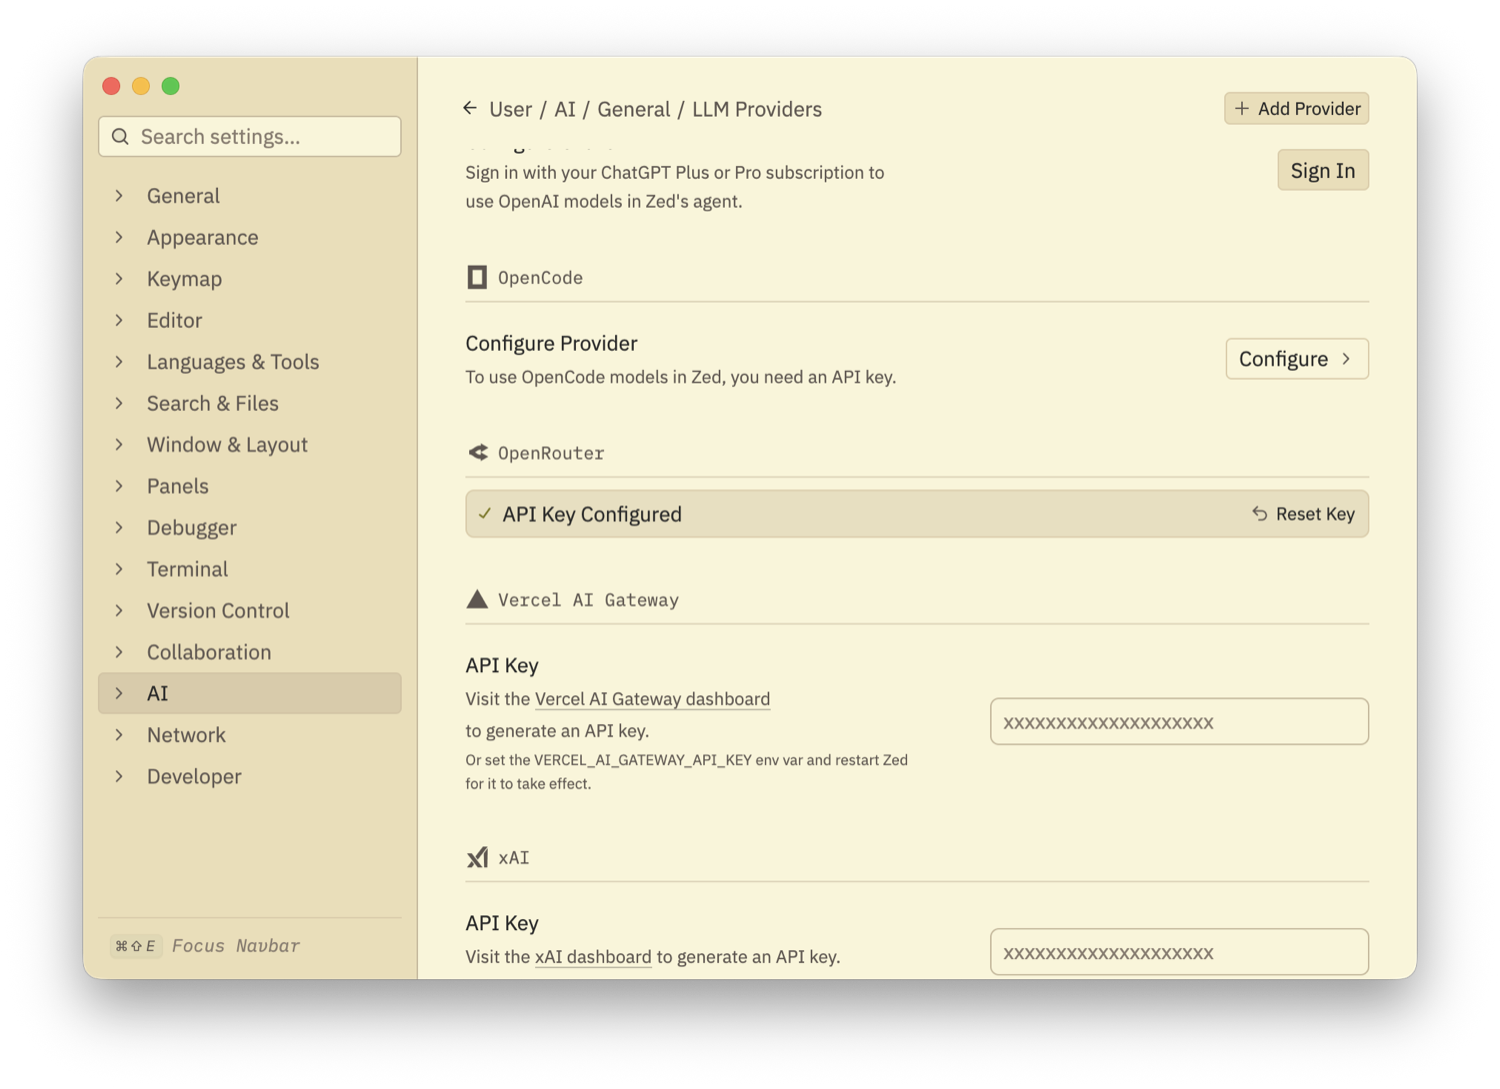
Do not click “Add Provider”. OpenRouter is already built in, farther down the list — that button is for providers Zed does not ship with. If you cannot spot it, use the Search settings… box at the top left and search for OpenRouter.
d. Pick an OpenRouter model
Go back to the Agent Panel, click the model name at the bottom right, and choose one of the OpenRouter models now in the list. That work is billed to your OpenRouter credit instead of to Zed.
Start with GLM 5.3 Flash — slug z-ai/glm-5.3-flash. It is built for exactly this kind of work: efficient coding and long-running agent tasks, with a 1M-token context window so it can hold a real codebase in view. At $0.15 per million input tokens and $0.50 per million output, a few dollars of credit covers far more building than most people get through in a month.
It is not as sharp as Claude Sonnet 5 on genuinely hard problems. That is the trade you are making to pay nothing monthly — and it is a good trade for the bulk of setup work, which is mechanical.
e. Turn thinking on
This one is easy to miss and it matters. By default Zed sends the request with reasoning off, so GLM 5.3 Flash answers immediately without thinking first. That is fast and cheap, and noticeably worse on anything hard.
Open Settings → Edit in settings.json (the button in the top-right corner of the settings window, visible in the screenshots above) and set your default model like this:
The file lives at ~/.config/zed/settings.json. Zed hot-reloads it, so the change takes effect on your next message — no restart.
With enable_thinking on and no effort level set, OpenRouter applies its own default (medium) reasoning effort. You are trading some speed and some output-token cost for materially better work on the problems where it counts. Leave it on.
This recommendation was checked on 2 September 2026. Models move faster than documentation does. If you are reading this after October 2026, assume something newer, better, or cheaper exists — open openrouter.ai/models, sort by price, and look at what is near the top before you commit to any model named on this page. The instructions here do not depend on which model you pick.
Before you start building
Point the agent at the project rules. Tell it to read AGENTS.md at the start of every session. The repo ships both CLAUDE.md and AGENTS.md, and that file is what keeps it building the way the rest of these instructions assume.
Fair warning, honestly. The AlpacApps pages are worded for Claude Code and Codex — the steps all apply, you will just translate the occasional button name. Zed’s Agent Panel is also a plainer chat than Claude Code, so you steer more of the work yourself. If that starts costing you more time than the subscription would cost in money, switching later is easy: nothing in the project is tied to one agent.